
How I created this page with Astro and Sanity - Part 3 - Sanity Schemas
Now, it's time to extend the Sanity Schemas, for my blog I wanted to create a collection of code examples. These code examples are categorized by the programming language they are written in.
Working with Sanity types and fields
You can define the structure of your content when working in the Sanity repository that we created in the first post in this series. Maybe you even took the time to look through the blog boilerplate?
So, with that in mind i started thinking of how I wanted my content to be structured. I want examples to be easily put into blog posts, while giving the reader a link to the code example with a more in depth explanation.
And readers of my blog should also be able to browse all my code examples by language. What I came up:
Sanity code languages definitions
import {defineField, defineType} from 'sanity';

export default defineType({
  name: 'codeLanguage',
  title: 'Code Languages',
  type: 'document',
  fields: [
    defineField({
      name: 'title',
      title: 'Title',
      type: 'string',
    }),
    defineField({
      name: 'slug',
      title: 'Slug',
      type: 'slug',
      options: {
        source: 'title',
        maxLength: 96,
      }
    }),
    defineField({
      name: 'body',
      title: 'Body',
      type: 'blockContent'
    }),
  ]
})By using the `defineField` and `defineType` functionality from Sanity, you can easily structure your content just the way you want.
Types
In Sanity, types define how the content should look like. I tend think of them as blueprints of documents in a collection. My "collection" here will be titled "Code Languages" (in Sanity Studio) with the name (in the Sanity content lake) "codeLanguage" (this is the `_type=` when querying for content). You can see this in Sanity Studio.
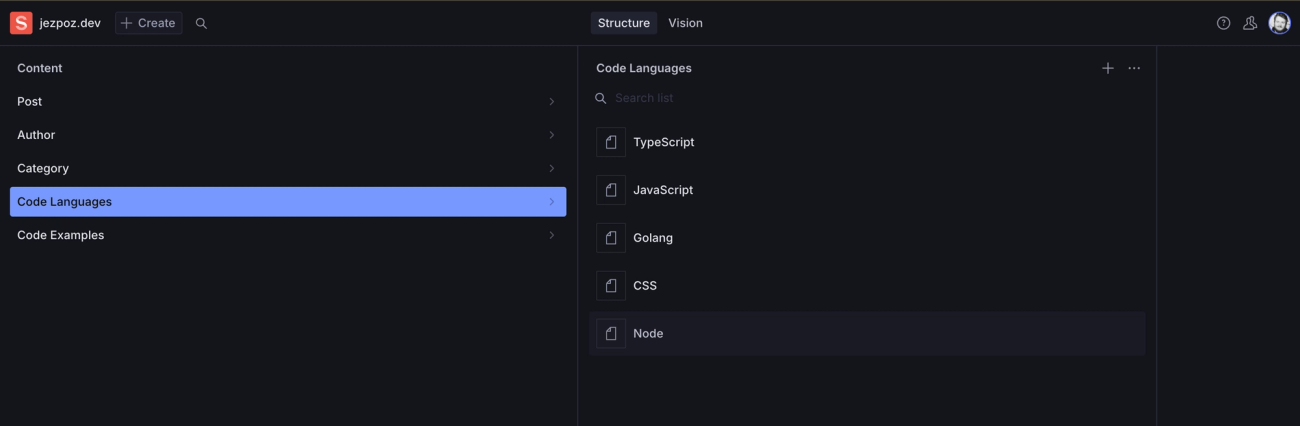
All the of programming languages I have as entires in my collection will have the fields defined in the schema.
Fields
The fields represent the data the entries in a collection has. In my example I use some different fields. Keep in mind that the `title` is what is shown, and the `name` is used when querying within the collection.
Even though my fields for programming languages is very simple, I'd like to explain them.
- Title (name: title, type: string)
This field is pretty easy to understand, it is title of the programming language. I like to think of the type string as a single line of text, or just one sentence. When working with bigger texts that has more content, use the `bodyBlock` type, (it comes with the blog boilerplate) - Slug (name: slug, type: slug)
Slugs are URL-friendly strings that is used for routing. I am actually unsure why it got the name slug. This field has some configuration to it, it can take a source (as I defined in the example) and return a URL-friendly string. Because some letters or characters are not valid in URLs, for instance spaces or slashes. I use this field to fetch content based on the route the user is on. You might see this in the URL of this page. I also put a maxLength of 96 characters so the URL wont be super long. Readable and simple URLs are also good for SEO (I think, I have not really dived deep into that). - Body (name: body, type: blockContent)
This field is where the content of the page is stored. This field-type builds upon the block-type (which is built into Sanity). The Block Content field is in essence an arrays of blocks, of different types. I think the Sanity Dcos for the block type explains it better than I ever will.
With that out of the way I started working on the code example part:
Sanity code examples definitions
import {defineField, defineType} from 'sanity';

export default defineType({
  name: 'codeExample',
  title: 'Code Examples',
  type: 'document',
  fields: [
    defineField({
      name: 'title',
      title: 'Title',
      type: 'string',
    }),
    defineField({
      name: 'language',
      title: 'Language',
      type: 'reference',
      to: {
        type: 'codeLanguage'
      }
    }),
    defineField({
      name: 'slug',
      title: 'Slug',
      type: 'slug',
      options: {
        source: 'title',
      }
    }),
    defineField({
      name: 'content',
      title: 'Content',
      type: 'code',
    })
  ]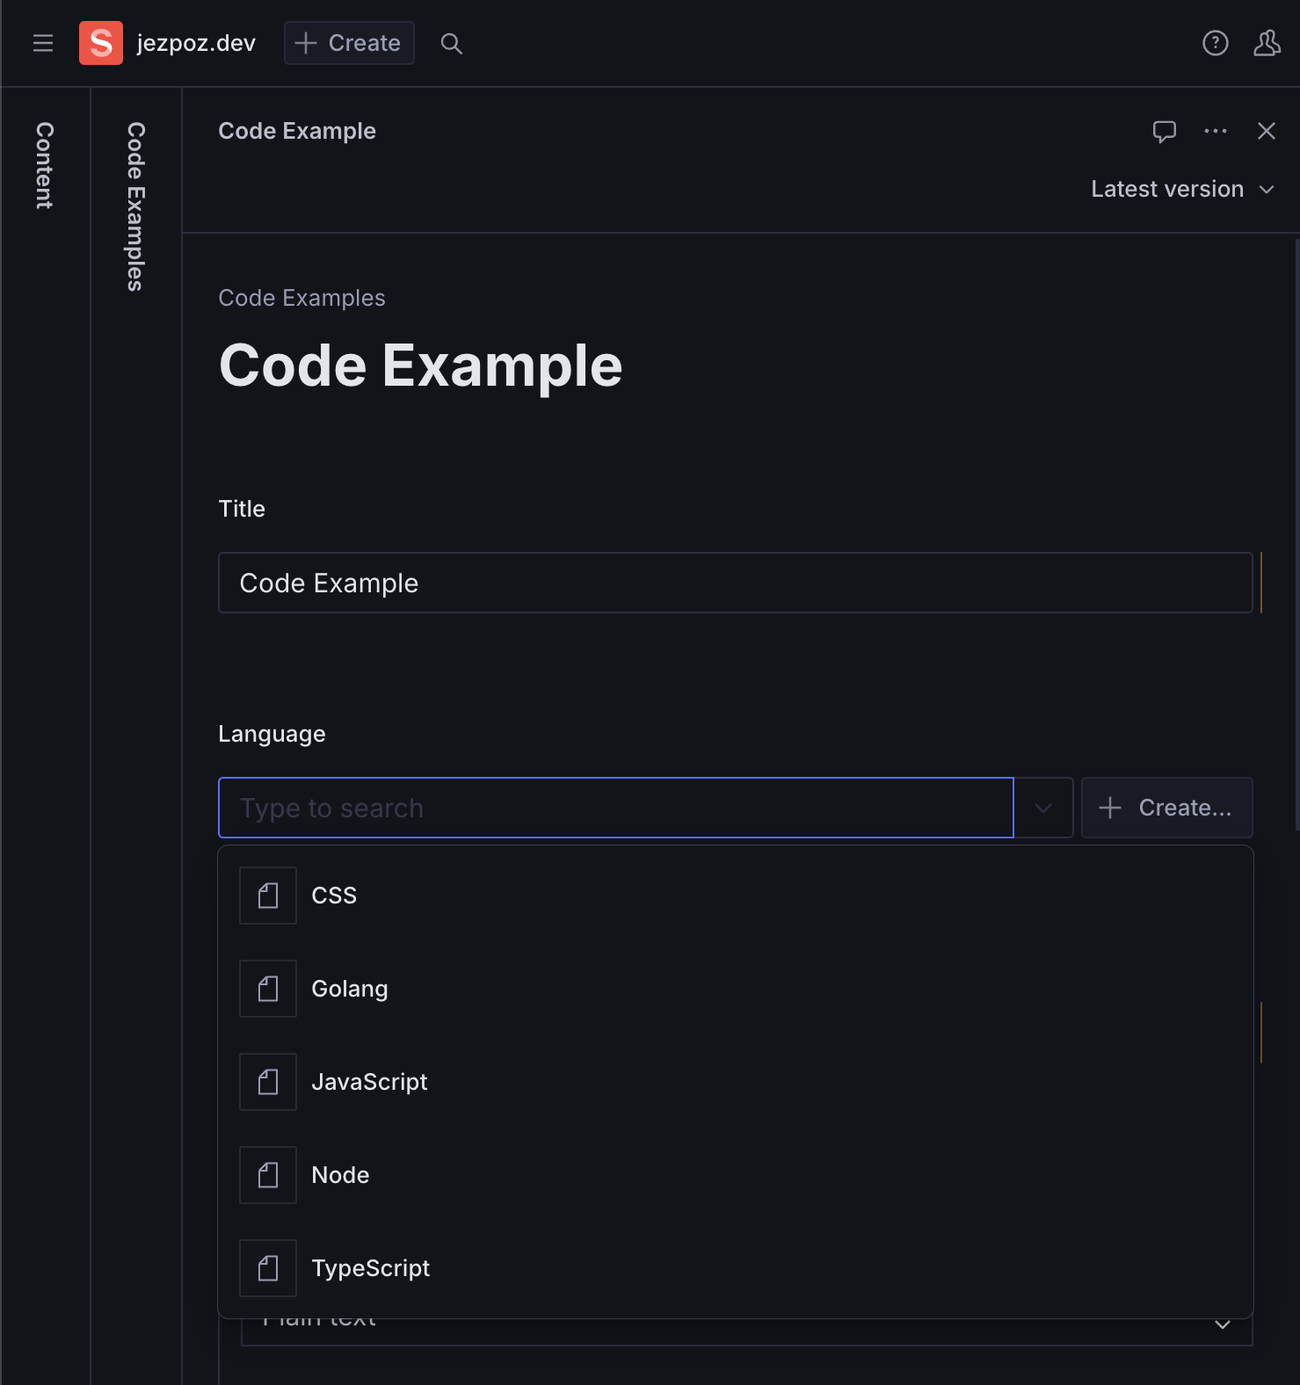
});Now this definitions is a bit more advanced. It still has the title and slug, but I've added a reference-field and a code-field.
Reference
When working with content, you usually wants to connect one piece of content to another, and in my example I want to connect the code examples to a programming language. Further down the line I might also connect them to a category, but this is not implemented for now.
When using a reference-field you have to supply what kind of entry you want to reference, and this is done by the name (note: not the title, see that I have `codeLanguage`) of the type. When editing this field in Sanity Studio you will get a dropdown of all the entries of the type that is defined in the configuration of the field (there is also an option to create a new entry of that type).
Other kind of fields
You might have spotted that I used a field with the type "code". And you might also get an error if you just copied my code straight into your Sanity repository. This is because this type is an Sanity Plugin called Code Input.
As the page for the plugin says, it gives a syntax highlighted editor for code. This field also allows to choose what kind of programming language the code is in, so it makes it easier for the Astro Code-component to render the code with the correct syntax highlighting.
There are a lot of cool and handy plugins for your Sanity Studio, so I advice to check some of them out.
Whats next?
In the next post I will go through and explain how I use the types and fields we have defined, in Astro to render the code examples in blog posts and as their own respected pages. See you there!